Application and function
The epoxy plastics have, as seen, many application areas and each area requires special application methods. The final results are always a function of material properties, the substrate’s properties and execution. Application techniques will now be described for some of the application areas addressed on this site.
Impregnation
The simplest treatment that is performed on concrete substrates is impregnation with low viscosity epoxy plastic. The purpose is to strengthen the concrete’s surface layer, both mechanically and durability-wise. As epoxy material, aqueous emulsified epoxy, solvent content epoxy or non-solvent epoxy are used. The materials are always non-pigmented and without fillers.
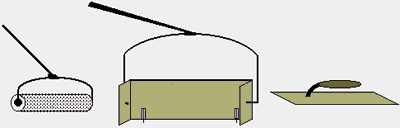
Application is performed using rubber squeegees on handles. Suitable widths are 40–60 cm. The surface shall be saturated with epoxy plastic. To avoid shiny spots, it is appropriate to roll afterwards with felt rollers. For solvent and aqueous epoxy, good ventilation is necessary.
Priming
Concrete and other absorbing substrates that are to be coated shall always be primed first. The primer has several tasks. It shall saturate the concrete so that the binding agent from the coating does not vanish down into the substrate instead of strengthening the surface layer.
Furthermore, the primer’s low viscosity makes for good wetting against the substrate, which is of primary importance for adhesion. If the primer is diffusion-open, it can stop the moisture flow from the substrate and thus make it possible to apply a diffusion-tight coating on a damp substrate.
Epoxy for priming can be solvent-free, solvent-bearing or aqueous emulsified. A solvent-free primer can be applied in ample coats and thus provide good fill of pores and voids. However, it is inappropriate to use this type on moist substrate if it is not diffusion-open.
Solvent-bearing primer has good penetration properties in porous substrates, but this also implies that the solvent forces its way down into the substrates. Because epoxy resin has very high solvent retention, i.e. the capacity to retain solvents, the risk is great that the solvent will be closed in when subsequent coatings are applied. When it comes to priming of non-absorbing substrates, such as sandblasted steel surfaces, it is often advantageous with a few percent of grease dissolving solvent. A solvent-free primer cannot even dissolve small amounts of grease. This means that, for example, fingerprints on a cleanly sandblasted surface can cause degraded adhesion if the primer is completely free from solvent.
The aqueous emulsified primer can generally be applied on both dry and damp substrates. The substrate’s temperature and the air’s relative humidity must be checked to ensure that the water in the epoxy primer can evaporate. As a rule, +10°C applies for the substrate and a maximum of 80% relative humidity in the air. Aqueous emulsified epoxy cannot be applied in thick layers. The primer material is applied with rollers or is spread with rubber squeegees and rolled afterwards. It is often necessary to repeat the priming to achieve the desired purpose.
Solvent-free and solvent-bearing epoxy primer shall always be covered as soon as possible. In practice, this means within 12–24 hours. If the primer layer is not covered within 6–7 days, there is great risk for poor adhesion between the epoxy layers. This is related to the epoxy’s carbonation. An aqueous dispersed primer generally contains such small amounts of free amines that carbonation does not occur. This type of primer can therefore be covered up to one month after application, as long as the surface is cleaned from any contaminants.
Thin layer coatings
Thin layer coatings refers here to pigmented epoxy plastic for coatings of about 0.3–1 mm.
These coatings are intended to provide a homogeneous, continuous film that protects the substrate from wear and chemicals. The surface can be made smooth or include anti-skid properties. The material consumption must be adapted to the substrate’s surface profile to achieve a specific minimum layer thickness.
Thin layer coatings of 0.3 mm can be aqueous emulsified/dispersed and are normally applied in two coats using rollers.This type of coating may be permeable to water vapor.. Anti-skid in the form of quartz sand or glass beads can be sprinkled over the first layer before it hardens.
Solvent-free coatings can be applied with rollers up to about 0.5 mm. Thicker layers are applied with trowels. Anti-skid can be sprinkled on the unhardened coating.
Both of the described types of thin layer coatings can be lightly sprinkled with coloured flakes to give the surface a decorative appearance.
Flaked surfaces shall always be given a lacquered coat.
If the coating is intended to be diffusion-open, the lacquer coat must also be diffusion-open. The surface lacquer is applied with felt or mohair rollers in a uniform coating.
Screed coatings
Screed coatings of epoxy plastic encompass many different types. A common denominator is that they contain epoxy as the binding agent to mineral filler. The filler is often quartz sand of various grades.
Screed coatings are easily divided into three types:
- Self-levelling screeds
- Dry mortars
- Top loaded screeds
A self-levelling epoxy screed consists of about 35% binding agent and the rest filler and pigment. It is commonly applied in layer thickness’s of 2–4 mm. The filler shall be graded so that the granulate maximum makes up about 1/3 of the layer thickness. Furthermore, the filler shall be evenly distributed from the bottom to the surface after the compound has hardened. The binding agent content in self-levelling screeds is sufficient for each filler granulate to be surrounded by binding agent. They shall thus be considered as completely tight.
 Self-levelling screed with graded filler
Application is by trowel, pin rake or special applicator.
Spiked roller, special applicator and trowel
After application, the surface is normally treated with a spiked roller to puncture any air bubbles. Edges shall be formed with an approximately 5 mm deep groove in the substrate. Anti-skid material can be sprinkled over the compound before it hardens.
Mortars consist of epoxy binding agent and quartz sand. The quartz sand is often coloured to give the coating a decorative appearance. The binding agent content is low, commonly between 14 and 15% by weight.
Mortars are normally applied in layer thickness’s of 3–6 mm. The low binding agent content is not sufficient to fill voids between the grains of sand, and coatings of this type cannot be considered as entirely tight. The application of mortars is either by rendering on laid strips or with a hand-drawn trowel with adjustable gaps. After spreading, the surface is finished with a straight tool or helicopter. The day after the compound has hardened, the surface is sealed with an epoxy lacquer.

Dry mortar
Toploaded screeds are built up by dry, often coloured quartz sand being spread over an epoxy binding agent. Depending on how the coating is built up, the final results can be considered as tight or non-tight. If the binding agent is unfilled epoxy that is rolled on the substrate, it will be capillary absorbed by the sand. The compound then attains a porous structure. If the epoxy binding agent instead contains filler that quickly separates after spreading, a bed for the sprinkled-in sand is formed. After saturation, the free sand thickness on the surface consists of about 1.5–2 grains.
Such a thin open structure can be easily saturated with surface lacquer and the coating can be considered as completely tight.
![]() Mortar with sand bed
Mortar with sand bed
The application involves an epoxy binding agent being spread in an even layer on the substrate. For systems with fillers, pin rakes or special applicators are used. Unfilled epoxy binding agent is applied with rubber rakes and finished rolled.
After laying the epoxy binding agent, sand is sprinkled on the surface to full saturation. Glossy spots may not occur. The day after, the excess sand is removed and the surface scraped with a steel blade on a handle to remove projecting grains of sand. After careful vacuum, the surface is lacquered with epoxy. The lacquer is distributed with rubber squeegees and finished rolled.
This type of coating automatically attains built-in anti-skid.
The degree of roughness is regulated by the lacquer volume.
Normally, the coating is 3–5 mm thick.
Injection
To be able to inject epoxy plastic into cracks, one should have special equipment. There are several models of such devices.
Two common injection devices are shown on the following page. In some cases, one can get by with gravity, for example, when void injecting in floors.
It is essential that the devices have manometers.
Normally, pressure no higher than 0.03 to 0.3 MPa is required, and a hand pump can most often be used.
The procedure for injection is as follows:
The concrete surface is cleaned to a width of 10 cm on each side of the crack. The nozzles are glued with contact adhesive over the crack. The distance between the nozzles is determined from case to case. One can generally say that the distance shall be longer between the injection nozzles the wider the crack. The distance should not exceed 20 cm for a crack width of 0.5 mm and not exceed 50 cm for a crack of about 1.5 mm.
Epoxy putty is used to seal around the nozzles and over the crack between the nozzles. If it is a through-crack and the rear is accessible, the crack shall be sealed there too. All cracks that are connected with one another shall be equipped with nozzles. The only entry points to the crack or cracks are now via the nozzles. To check for openings, dry compressed air is blown through. The injection plastic shall be as low viscous as possible. If the temperature in the concrete that is to be injected is very low (under 8°C), the viscosity of the injection plastic will increase as it cools and injection will go very slowly. In cracks under 0.2 mm, it may be impossible to press in the plastic. Supplements of solvents may not be used!
One commonly uses epoxy systems with long potlife.
The epoxy resin and hardener is mixed very carefully according to the specified mixing proportions. The mixture is poured into the injection container (if a hose pump is used, the suction hose is inserted into the epoxy mixture) and the discharge hose is connected to the lowest injection nozzle. The deeper the crack the slower the plastic is pressed in, i.e. the pressure shall be as low as possible.
Later, when the plastic emerges from the other nozzles they are sealed with plugs. Injection continues from the first nozzle as long as plastic forces its way into the crack. When no more plastic forces its way in, the hose is moved to the next pipe, and so on.
A metre-long hose is attached to the upper pipe and secured in the vertical position. Injection continues until this hose is filled. Pumping is then temporarily stopped. As the voids and micro-cracks are filled with plastic, the level in the attached hose falls. This is compensated with more injection plastic being pressed into the crack. In this way, work continues until the crack is saturated.
The nozzle and surface sealing remain for a day or so until the plastic has hardened.
When injecting around beams in floors, one must be very careful with respect to pressure.
A pressure of 0.1 MPa produces a lifting force of 100 kN/m² (10 ton/m²).
 Injection equipment, pressure chambre model
 Injection equipment, hose pump model
Gluing of new concrete to old
To attach new concrete to old, or to another substrate, epoxy plastic can be used in two ways.
The first method is a standard gluing, and is carried out so that the epoxy glue is evenly distributed over the surface to be cast to. Concrete is then poured over the unhardened glue. The glue shall be plentifully applied. The normal consumption is about 0.5 kg/m². The glue’s open assembly time, i.e. the time available to cast concrete after the glue is applied, must be observed.
This time varies with the substrate’s temperature. The concrete shall be kept somewhat drier than normal, since no water will be absorbed by the old concrete surface. The hardening time is relatively long for this type of glue.
The other method involves applying an epoxy binding agent on the old concrete. The surface is sprinkled with quartz sand to full saturation. The day after, the excess sand is swept away and casting can begin. This method is especially well suited for levelling mortar.
Repairs of corners, edges and surface damages
Generally, for all repairs and damages to concrete, one shall avoid feathering the repair material thickness to zero. This especially applies to floors with heavy loads.
The reason for this is that the concrete has less compression strength than epoxy. With thin layers, there is a risk that the concrete can be crushed during the repair and new damage would thus occur. The procedure is therefore to cut a groove at least 3mm deep at the edge of the damaged area, and thereafter hew away a portion of the surface layer.
The repair material consists of epoxy putty or mortar of epoxy binding agent and quartz sand.
Damages to epoxy coatings are prepared in the same way with a cut groove. The repair is performed with the same material as the coating.
 Lamination
Lamination means constructing something in many layers. Epoxy is used largely together with fibres of glass, carbon, aramide and polyester in laminate constructions.
Such laminates are used alone, for example, in auto-mobile chassis, boats and aircraft parts, as well as in conjunction with substrates such as steel or concrete for internal coating in tanks and cisterns.
The basic principle for all lamination with fibre and a matrix (for example, epoxy plastic) is that the matrix shall enclose each individual fibre in the fibre bundle.
Each fibre bundle in a fibreglass weave contains about 400 fibres with a diameter of about 10 mm (1 mm = 1/1000 mm). The epoxy plastic must have good wetting properties and good adhesion to the fibres. To insure that air in the fibre bundles is removed, a rubber squeegee or short bristle roller is used to press in the epoxy.)
Various methods for manufacturing laminate are, for example, hand lamination, injection, prepreg, pultrusion and filament winding.
When several layers of weave will be used, one strives to work wet on wet until the full thickness is attained. The weave shall always be laid with an overlap of 5–10 cm. For multiple layers, joints shall be offset. Weaves have maximum strength in the fibre direction, which can in many cases be utilised.
When laminating on concrete or steel in a cistern, work begins on the walls. The weave is extended about 30 cm onto the floor. In the transition between wall and floor, a fillet shall be formed with epoxy putty so that the weave has a soft transition. All lengths shall be cut in advance. The laminating epoxy is applied to the wall with rollers. The weave is applied and worked with a rubber squeegee so that no air bubbles or creases remain. The surface shall thereafter be saturated with laminating epoxy.
When the lamination on the walls is finished and hardened, the joints are puttied with epoxy putty.
The weave that was run onto the floor is sanded free from loose strands and irregularities. The floor lengths are measured and cut so that they run a few centimetres from the wall. The first length is laid out on the dry bottom. The laminating epoxy is poured on the weave and distributed with a rubber squeegee. The weave shall be saturated immediately. The second length is laid with an approximately 10 cm overlap and the laminating epoxy is applied as before.
If two layers of weave are to be laid, it is best to split the first length of the second layer; this so that the overlaps will be offset.
Concrete sealing
Concrete that is subjected to aggressive environments must be protected. Epoxy plastic, due to its very high alkali resistance, is a suitable material for this purpose.
An example of concrete in tough environments is a bridge where water, salt and air pollutants constantly affect unprotected concrete sections. One of the bridge sections that is protected with epoxy is the inside of the edge beam. A thixotropic epoxy is applied in two layers so that the thickness of the insulation is at least 0.5 mm.
Application is normally with brushes.
For all outdoor work, consideration must be taken to the weather. Temperature has a substantial influence on both the epoxy’s hardening time and viscosity. Moisture, both in the concrete and in the air, can cause problems with adhesion and blistering. One shall ensure that the concrete has a temperature that is about 3°C over the current dew point. (See the chapter on adhesion for details.) The blistering that sometimes occurs before the epoxy has hardened often has its natural explanation and is grounded in purely physical laws. Upon heating of gases, these expand for each degree of increase with 1/273 of their volume at 0°C.
The pressure that arises in a gas mixture such as, for example, air and water vapour, is equal to the sum of the components’ partial pressure. In concrete that has a void percentage of about 15%, the gases consist of air and water vapour. If one for simplicity’s sake shall assume that the air in concrete is saturated with water vapour, the following applies:
If the volume of an air pore is set to 1 at 0°C, the gas volume increases to 1.09, i.e. 9% at a temperature increase to 20°C. If we set the volume to 1 at 20°C and raise the temperature to 40°C, the gas volume increases to 1.16 or by 15.6%.
Concrete always has a certain porosity in the surface. This is especially apparent when sandblasting. If the pores are not filled with epoxy during application, there will be a thin film over the voids. A small temperature increase entails that the gas volume in the covered voids increases. Because the unhardened epoxy cannot withstand the pressure, blistering occurs.
To avoid blistering, keep the following in mind:
- Avoid heating the concrete surface.
- Preferably apply in the morning when the concrete is cool.
- Avoid direct sunlight.
- Try to fill the pores during application.
- Keep epoxy cans out of direct sunlight. Raised temperatures entail shorter potlife with substantial temperature increases, and degraded wetting and adhesion as a result.
- Never thin the epoxy with solvent.